HOME | DD
 LastHowl — Werewolf Tutorial 4
Published: 2005-02-21 01:09:03 +0000 UTC; Views: 696; Favourites: 3; Downloads: 60
Redirect to original
Description
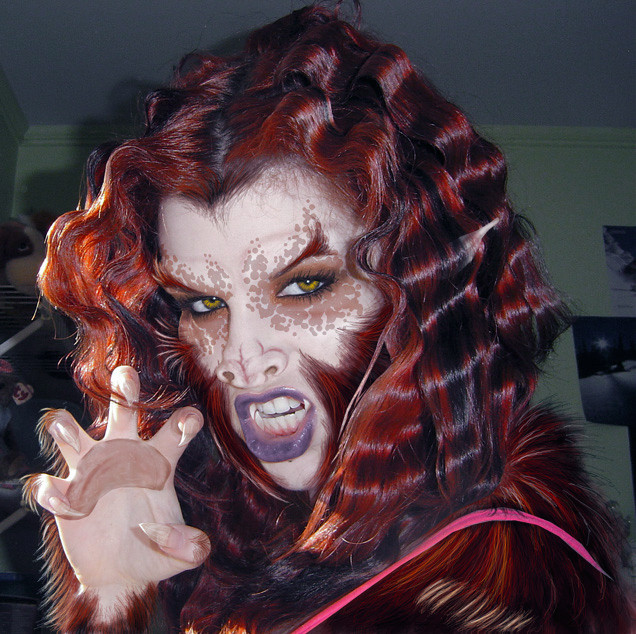
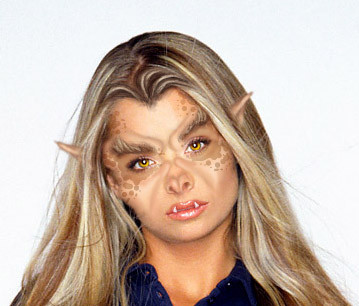
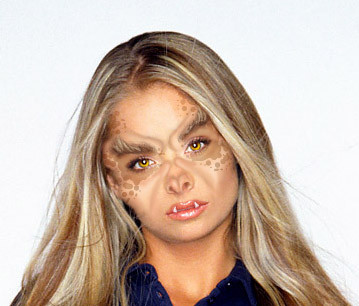
Step 4: Facial Details----------------------
The fourth image in this series is sort of a catchall for details
you'll want to add before tackling some of the bigger stuff later
on. They're just bits and pieces that are tough to do once you've
put in things like fur. I'll address each one I did in a little mini-
step.
[ Eyes ]
In the case of the picture I used as a base, her eyes were already a
good shade of brown for my purposes. Yours may not be.
Werewolf eyes can come in nearly any shade you fancy. I have a thing
for green, amber, and blue.
In any case, if the eyes don't start out in the color range you want
them to be, you're going to want to lasso-select the irises, then go
to alter the hue/saturation. That'll let you colorize the irises to
the proper color.
Once they're the proper color, I tend to lighten them up with some
highlight work. I only use a one-pixel brush at ten percent opacity.
First you do a bit of a middling color in the range you want, then
you do another pass in a smaller area with the lightest color in the
range.
[ Fangs ]
With most base images, you're going to have to make a decision here.
Unless the image shows both upper and lower teeth prominently
enough, you'll need to figure out which set of fangs you want to
draw. From what I've found it's best to go with whichever lip
protrudes more strongly. In the case of the image I did, the lower
lip was more prominent, so I did the lower fangs.
Fangs are a two-step process. First, make a shadow for them by
taking a shadow color from the lip they'll be resting against. If
you have enough teeth showing to do both sets, then take a shadow
color from between the teeth. Use your paintbrush to make a vague
shape of a fang. Make it a little bigger than you'll need, but not
too big.
Next, layer on the tooth color at about 25% opacity. If there aren't
enough teeth showing, just pick an off-white color that looks nice
to you.
Then, you're done. Simple, no?
[ Eyebrows ]
Some people like them, some people hate them. Some people like them
normal, some bushy, and some completely absent.
If you're a no-eyebrow person, you should have smoothed out the skin
back in Step 2 when you were building up the facial structure.
If you don't want to alter them, just make sure they're still
visible after you built up the flesh around them.
If you want to extend them, you get to have some fun, because you
get to learn a little about doing hair early.
Select the darkest hair color you can find. Use a 14-pixel diffusion
brush (the speckled ones) and build up an eyebrow shape you like
using 10-25% opacity. If you want finer definition, switch to a one-
pixel brush and do individual hairs. Try to get some highlights and
shadows in pretty early on.
Next, select a slightly lighter color from the hair. Keep your one-
pixel brush, and start to do highlights hair by hair. Work your way
up until you've got it to a point that looks good to you.
[ Skin Mottling ]
Totally optional step here. It's just something I've been trying
lately and found that it gives an exotic look.
It's also really simple to do if you have a graphics program that
supports layering and color selection.
Start a new layer and pick a really garish color that's not present
anywhere else in your picture. For this one I used neon green.
Go all the way to 100% opacity and just draw the shape of the
pattern you want the mottling to take.
Color-select this pattern, then discard the layer you took it from.
Instead, use the selection to alter the hue/saturation of the skin
beneath it. As you darken it, you'll notice it looks grayer. Up the
saturation a little until it looks right. Colors get more saturated
as they darken in most cases.