HOME | DD
 Zubby — Calgary Expo 2008 - Tutorial 1

Published: 2008-03-01 20:33:34 +0000 UTC; Views: 23334; Favourites: 559; Downloads: 840
Redirect to original
Description
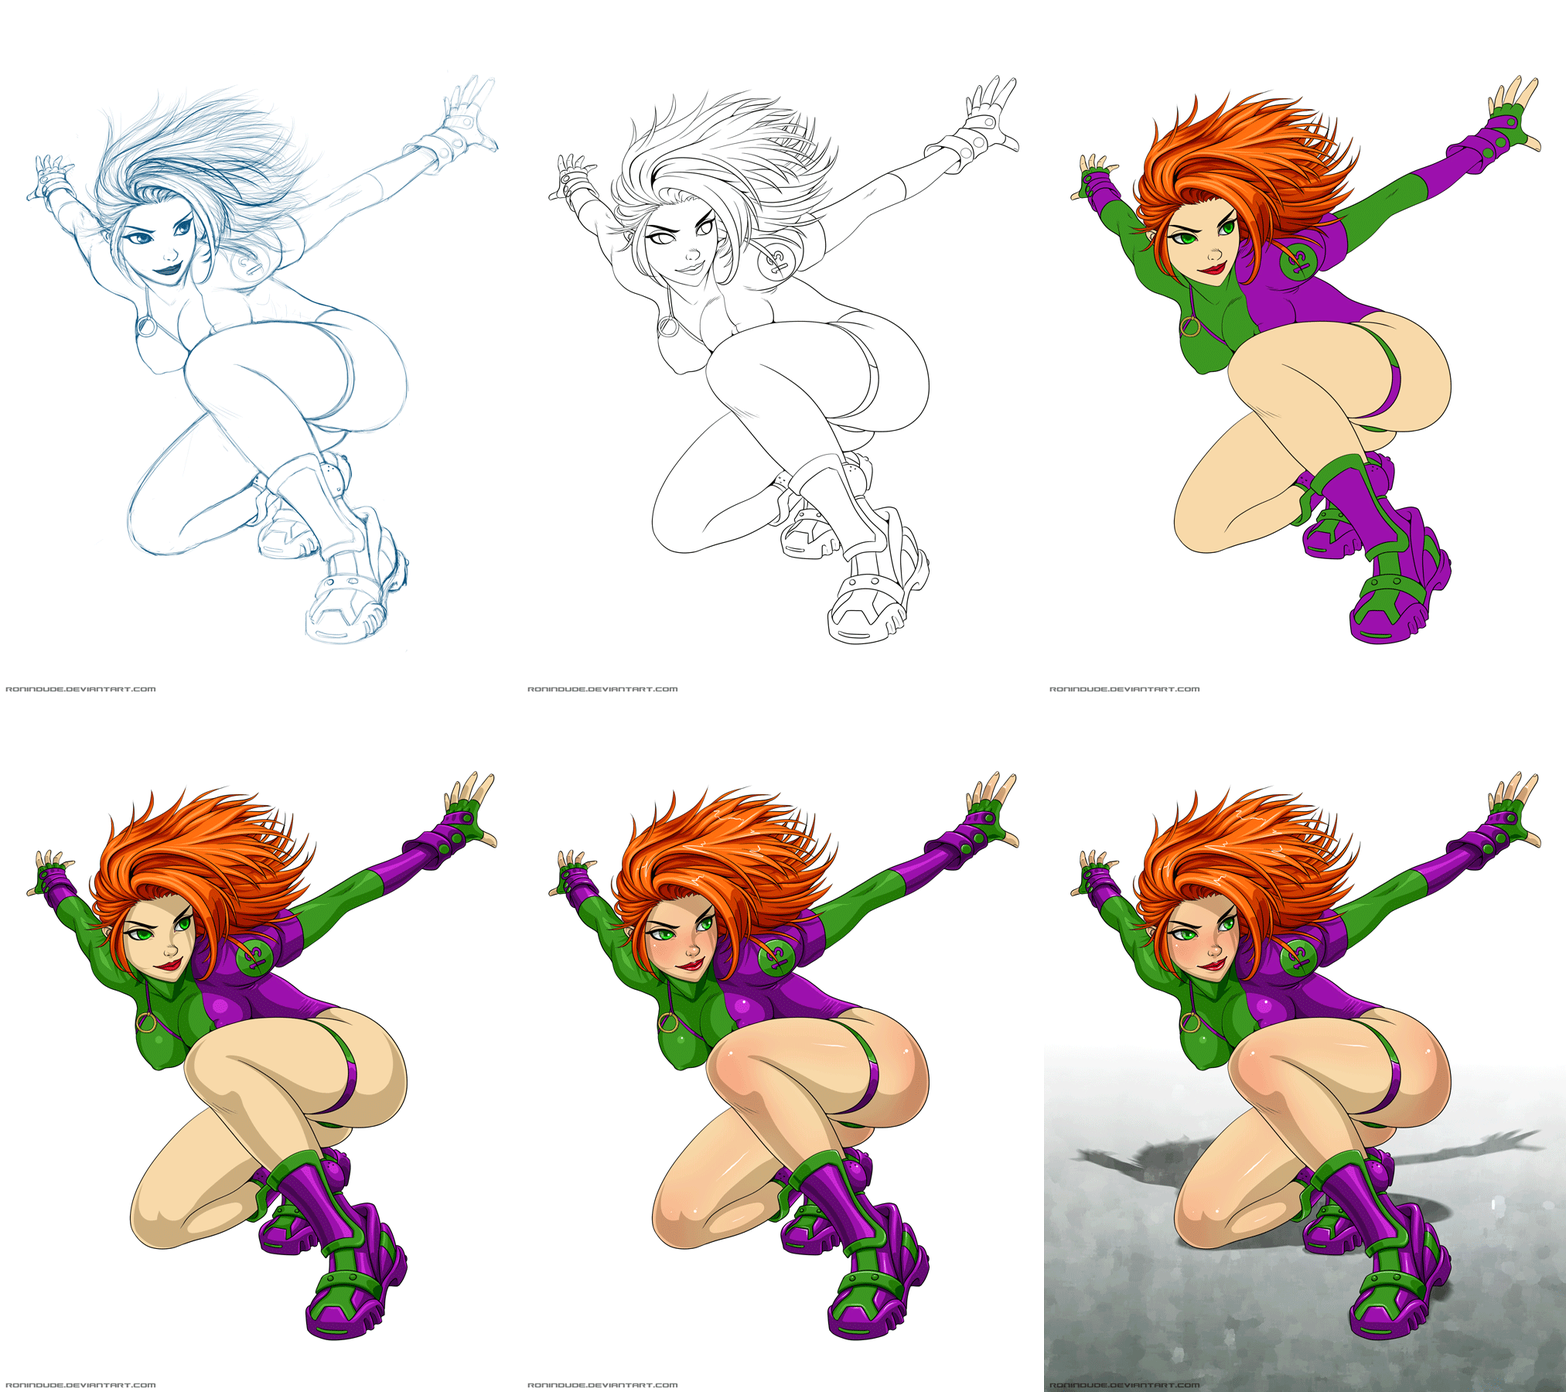
The first part of my tutorials covering how I did up this illustration .I hope you find it useful.
Related content




Comments: 56


👍: 0 ⏩: 0

Thank you! I found this extremely helpful and the steps easy to follow. I'm particularly grateful for your instructions on how to make the whites of a scanned image transparent. I would just set the layer to multiply and it's been such a hindrance for me.
👍: 0 ⏩: 1


I like this tutorial.
Printing those roughs on bristol board sounds really expensive though

👍: 0 ⏩: 1

My printer is bulky enough that I can feed art board right in to it and print it myself. It's not extremely thick, though it is thicker than standard printer paper.
👍: 0 ⏩: 1
I'm sure it is.
I just thought it sounded expensive to use multiple bristol boards itself for what are essentially just roughs. But that's just me
👍: 0 ⏩: 0


One question please: is your final draft done with ink?
👍: 0 ⏩: 1
In this case the final draft was done with pencil. I then darkened the lines by using Image> Adjustments> Levels to darken the lines and make sure the paper is pure white.
👍: 0 ⏩: 0


very usefull. thanks a bunch. alot of very great tips makes me realize im doing everything the long way. thanks!
👍: 0 ⏩: 1

You're very welcome. Glad you liked it.
👍: 0 ⏩: 0

Using channels to get rid of the white areas and leave only the line art? I think I should try that out. Thanks for that!
👍: 0 ⏩: 1
You're welcome. I hope you find it useful.
👍: 0 ⏩: 0

Now, does this make the lineart smooth, or does it make it all jaggedy like just selecting it?
👍: 0 ⏩: 1
Perfectly smooth if you Lock transparency on that layer to colour it. Try it out and you'll see.
👍: 0 ⏩: 1
I will! I've really been trying to get my lineart on it's own layer, but haven't done much more than stick the layer on multiply, where I have way less control. Thank you so much!
👍: 0 ⏩: 0


Wow! I had never used channels myself ... been keeping mine at high resolution to get such crisp linework. Perhaps I need to try this ...
👍: 0 ⏩: 0

This is very useful 
Thanks for the tutorial
👍: 0 ⏩: 0

Thats awesome, i'm just now working in photoshop to color pieces, this is very usefull info, thanks a bunch
👍: 0 ⏩: 0

I've never seen a tutorial like this. I'll def try this out. Thanks so much for sharing this
👍: 0 ⏩: 0

Very useul, thanks.
A question: why don't you draw the first step with a normal pencil, changing color in blue after scanning it and before printing it?
I don't know but I think it's probably harder to erase (with a normal rubber) a blue sign, if I make a mistake drawing the first sketch...
👍: 0 ⏩: 1
Well the blue pencils I'm using aren't pencil crayon, they're called Col-Erase and they have a nice pencil-like feel. I got used to using them when I was working in animation and I like the look they have. It also allows me to layer blue and then pencil right over top if I want to refine my sketch right on the page without just having a mess of grey pencil lines.
👍: 0 ⏩: 1
It makes sense. However, I asked because I've got a lot of unfinished works in grey pencil: too hard to complete them, because cleaning them up at the end is extremely boring (since I've always worked on a single paper without layers in different colors). I was wondering if I could scan them and use the same method of yours -even if they're not originally in blue- without big counter indications... And the answer seems to be yes.
👍: 0 ⏩: 1
Definitely. Just use the duotone mode from greyscale and choose a light blue as your mix colour and it'll dye it very light.
👍: 0 ⏩: 1


This looks VERY useful! I would go on about the different ways I could use it, but I think I'll just ramble for a very long time.

👍: 0 ⏩: 0


Thanks for the tutorial! It's very interesting to see how different artists work.
👍: 0 ⏩: 0

Thank you for doing this tutorial. I'm looking forward to the next installments!
👍: 0 ⏩: 0


your process is nigh identical to mine, pretty nice to see someone else do it too. I just don't use bristol. It'd murder my printer. Or is there some distinction in the bristol you use that makes it printer friendly? I'm only used to heavier bristol, myself.
👍: 0 ⏩: 1
Comic art paper isn't very thick (though it is obviously thicker than regular paper), so it will go through most printers okay.
👍: 0 ⏩: 1
huh, I'll have to look into it, never crossed my mind. thanks! I'm looking forward to your explanation of using transparency for coloring. I was taught to use channels, isolating the blacks, or layers and using multiply. But I've found both of those methods have their drawbacks, since you lose tonal value with channels, and as you said with multiply, you're continually darkening your line art.
👍: 0 ⏩: 0


why not just a multiply layer? Is there a difference?
👍: 0 ⏩: 1
Actually yes. A Multiply layer always gets darker, so you can't easily colour the lines light colours without it always looking darker. With the lines as a Normal layer on transparency with the 'lock trasparency' mode on I can have any line colour I want, reproducing that soft line look like they use in most animated features.
If you just want a black/dark ink line, a Multiply layer is fast and works fine. This method gives you more choices when you get to the colouring stage.
👍: 0 ⏩: 1

Hey Jim! Thanks for the tutorial, looking forward to the next installment!
👍: 0 ⏩: 0

This is really well written- it's much clearer than these sorts of tutorials usually are. I was just thinking the other day that I wanted to learn to colour using channels, so I'm glad to see this. I hope you'll go into how you got the great textures and watercolour feel on the final piece.
👍: 0 ⏩: 0


This is very useful. I'm quite inept when it comes to photoshop. Most of the time, to clean my line art, all I do is increase brightness and contrast haha. I'll try this out
👍: 0 ⏩: 0
| Next =>